Testing testing testing
Our ride on Sunday went fairly well. We strapped the bike on the car and drove it out to Woodside, center of the cycling universe. I wanted to take it on a real road, but with as few traffic distractions as possible. So I chose Canada road on Sundays, which has a sectino closed off to cars between Filoli estate and hwy 92. It was a perfect place to get the bugs out, and that we did. The first mile got us a flat on the rear wheel. this is a test of a true cyclist, if they thought to bring enough tools to fix a flat. Luckily, I had everything I needed, and we got back on our way after a ten minute intermission. The drivetrain held up fairly well, with a few chain derailments due to uncoordinated pedaling. This is a design flaw of the bike that we have two synchronizing chains, and non-rigid tension adjusters in each one. So as a result, uneven pedaling between captain and stoker causes a chain derailment. A proper design would use eccentric bottom brackets to take up slack in a synchronizing chain, but we don't have that. In theory, practice and ommunication can make up for this problem, so learning how to keep the chain on will be a worthy est of our communication and coordination skills!
The gearing choices I made seemed to be good enough for the hills up Canada Rd, which are a bit steeper than anything we'll see in Napa, so i'm contet with the rings I have. But the rear shifting was not behaving well at all. My guess is because we use a long shift cable running the length of the bike. The bike is steel, but somewhat flexible in design (another flaw) so although the cables are firmly attached to the frame, the frame flex may be causing the shift cables to change position at will.
Another problem is this special part, I'll call it the transfer gear. it was designed by the second team to work on this bike, and it's purpose is to allow the captain to coast (freewheel) while the stoker pedals. This is a big departure from standard tandem drivetrains, where both riders are synched together. But the purpose is allow the novice tandem team to pedal with a bit less fuss and bother of learning how to properly coordinate tandem pedaling. a good idea in theory, but in practice, the part is poorly made. It is basically an aluminum base plaate with a bolt circle for a chainring, mounted to the bottom bracket axle, but with an added freewheel on top. The captain's input comes at the freewheel, and the stoker's input comes from the other side of the bottom bracket axle. The black chanring is the main drive ring going to the back wheel. So when the bike is moving, the captain can coast, while the stoker powers the rear wheels. This let's the captain hold the bike with feet on the ground while the stoker begins pedaling, to get started, ,and then room to coast while clipping in to the pedals. Also, the captain can coast around sharp corners without forcing the stoker (who can't see the turn) to stop pedaling.
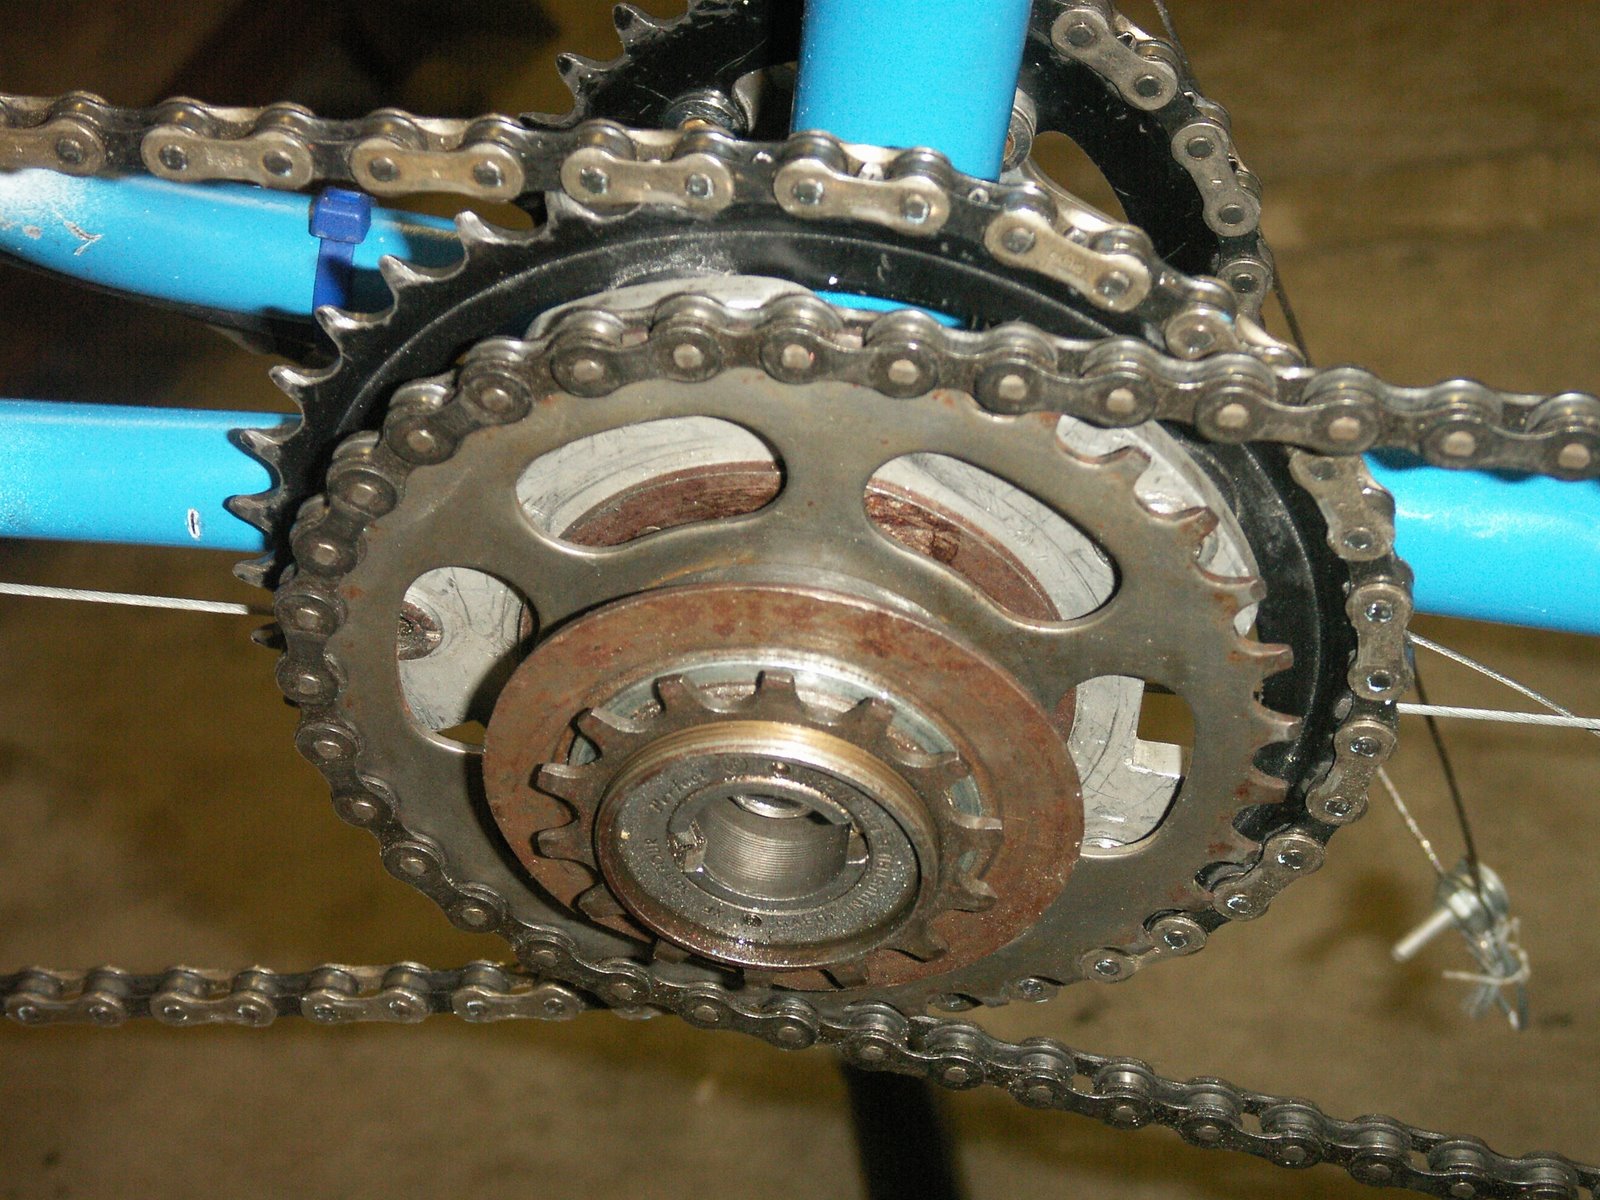
The problem as you can see here, is that the square taper hole which holds the part to the bottom bracket was not straight on center, thus causing a slight tilt to the whole assembly. The gap between chains is different from right and left sides in this view. This causes the whole thing to wobble a bit. also, the threading for the freewheel was done at a slight angle, so there's a double wobble.

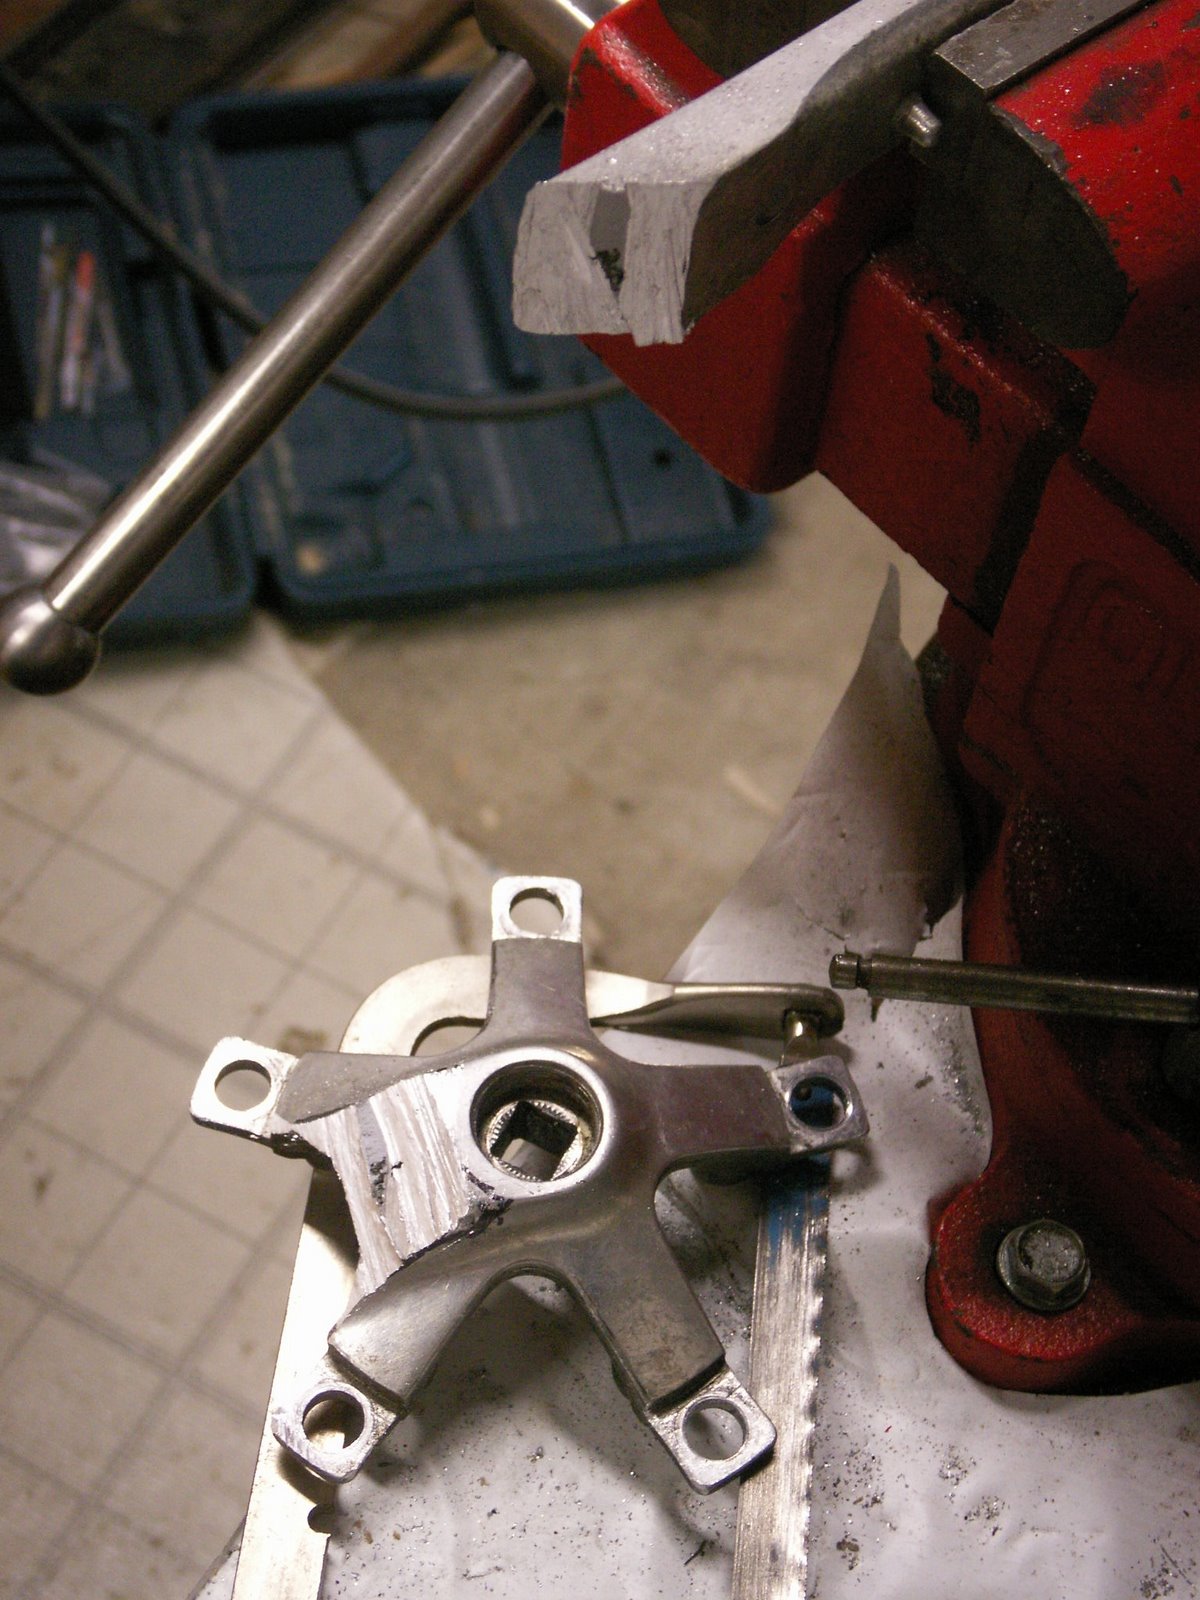
My solution is to not try to make another square taper myself, but use an existing bike part which has a proper square tapered hole. this can be found in an old crankset.
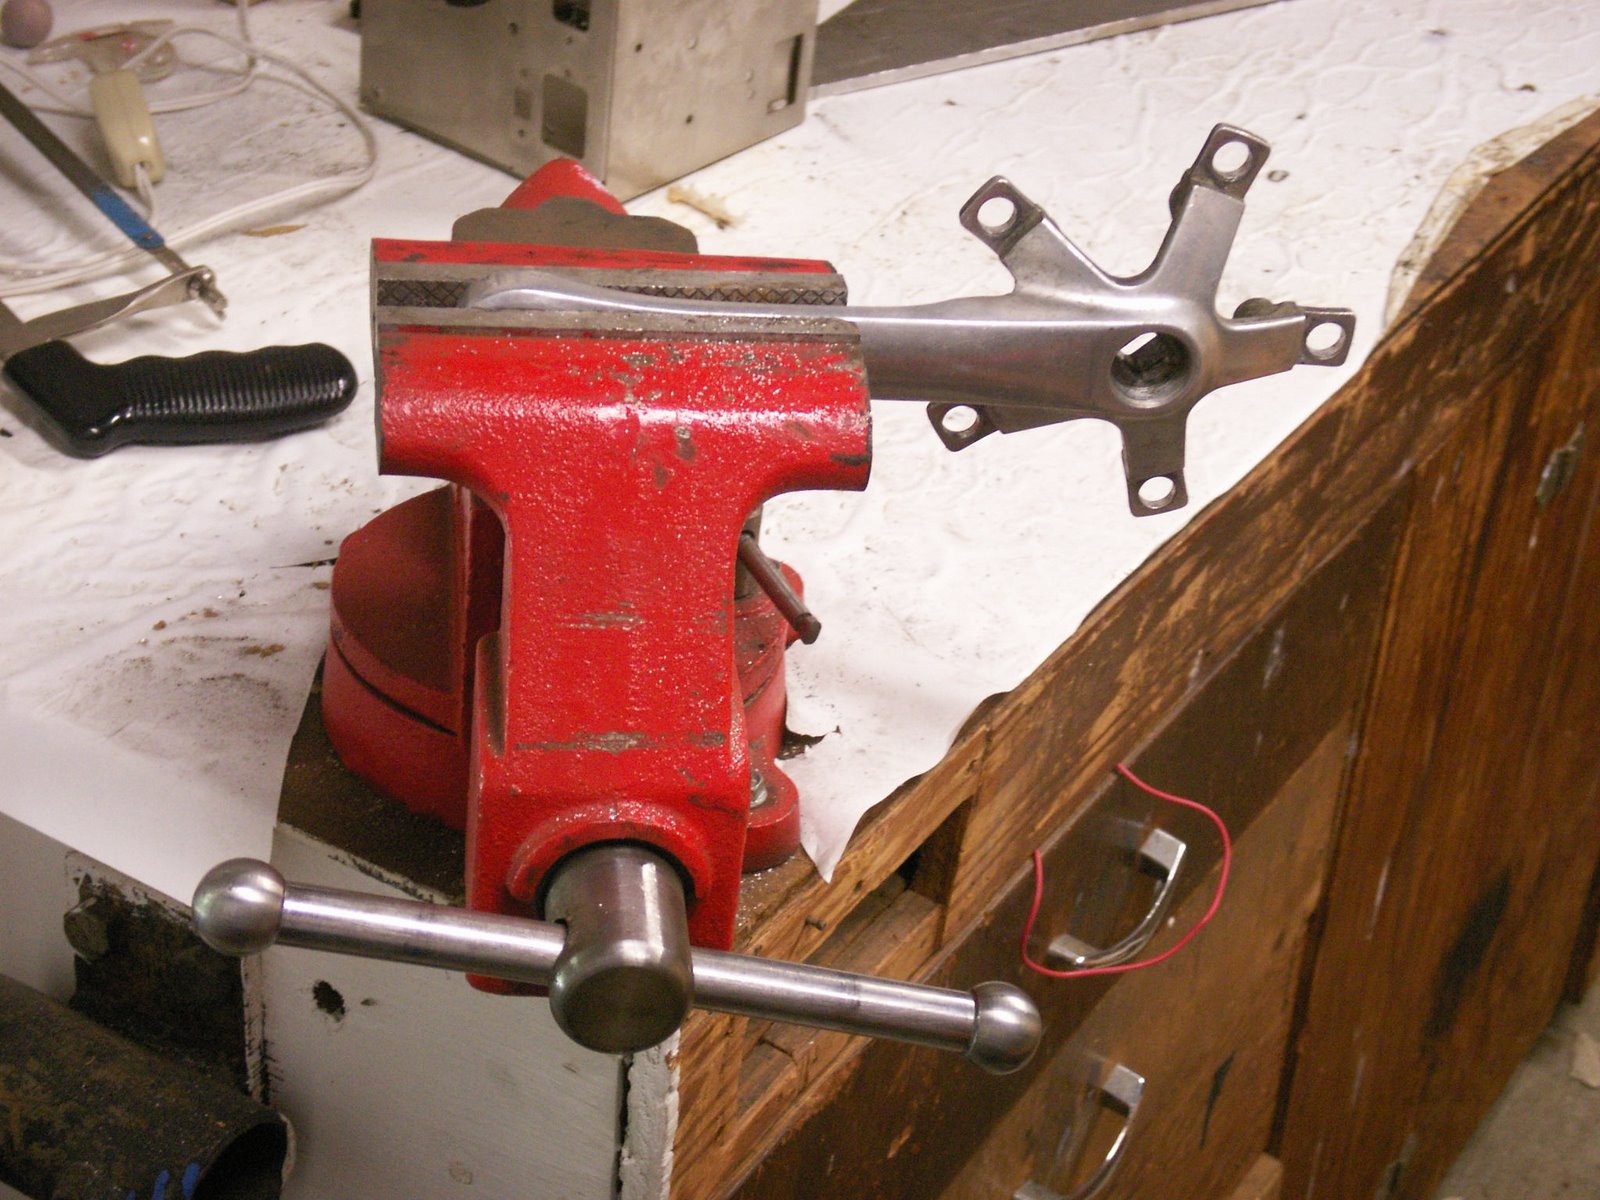
OUCH, I know the purists are crying, but I had to do it for Diabetes.

posted by willis @ 12:54 AM
0 comments
![]()


0 Comments:
Post a Comment
<< Home